Secure Email -Netscape Email IMAP SSL Configuration
Secure Domain Email Customers: If your secure email account with us uses a domain name other than 4securemail.com, simply use your domain instead of 4securemail.com wherever it appears in the instructions or the examples given. If you have purchased your own IP address & certificate, you may substitute any reference of mail.4securemail.com with your mail host name, e.g. mail.yourdomain.com.
- Step 1: Create your Email Account (Part 1)
- Step 2: Create your Email Account (Part 2)
- Step 3: New Account Setup
- Step 4: Identity
- Step 5: Server Information
- Step 6: User Name
- Step 7: Account Name
- Step 8: Congratulations
- Step 9: Account Configuration
- Step 10: Server Settings
- Step 11: Advanced IMAP Options
- Step 12: Outgoing Server (SMTP) Settings
- Step 13: Advanced Outgoing Server (SMTP) Settings
- Manufacturer Technical Support
This document will help you to configure a secure email account with your compatible Netscape Email client to work with the mail.4securemail.com Secure Email Hosting system.
Compatible Netscape versions: 6.2, 7.0
For Netscape Secure Email Server client POP configuration documentation, please click here.
Step 1: Create your Secure Email Account (Part 1)
Click on "Mail" button on the menu.

Step 2: Create your Secure Email Account (Part 2)
- If it is the first time you are configuring a wizard pops up to step you through.
- If you do not receive the wizard:
- Click on the "Edit" pulldown menu
- Select "Mail & Newsgroup Account Settings"
- Click on "Add Account"
Step 3: New Account Setup
- The wizard window opens. Select "Email account" if not selected.
- Click "Next."
Step 4: Identity
- Enter your name as you want to appear in your outgoing mail.
- Enter your Email address (ie: joeuser@4securemail.com).
- Click "Next."
Step 5: Email Server Information
- Select "IMAP" if not selected.
- Type mail.4securemail.com in BOTH fields of "Incoming Server" and "Outgoing Server."
- Click "Next."
Step 6: User Name
- Enter your user ID (ie: joeuser)
- Click "Next."
Step 7: Account Name
- Enter a name for this account (ie: Work Account).
- Click "Next."

Step 8: Congratulations
- Check the information on this window.
- If it is correct, click the "Finish" button; otherwise use the back button to correct the information.
Step 9: Account Configuration
To configure your account to work with the mail.4securemail.com Email system, you need to go through the following steps.
- In "Netscape Mail" choose the "Edit" pulldown menu.
- Select "Mail & Newsgroups Account Settings."
Step 10: Server Settings
- Make sure the "Use secure connection (SSL)" is checked.
Step 11: Advanced IMAP Options
- Click the "Advanced" button.
- In the top part of this window make sure "Show only subscribed folder" and "Server supports folders that contain" checkboxes are not checked.
- Click "OK."
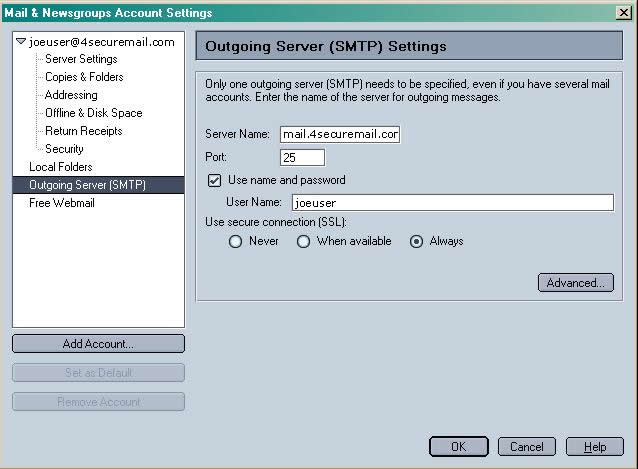
Step 12: Outgoing Server (SMTP) Settings
- In the left band select "Outgoing Server (SMTP)."
- Make certain that "Server name" is mail.4securemail.com and "Port" is 25.
- Click on the "Advanced" button.
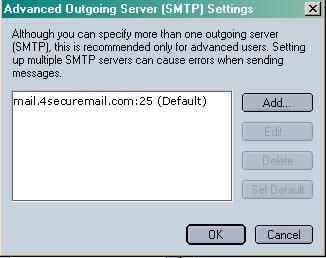
Step 13: Advanced Outgoing Server (SMTP) Settings
- Make sure "mail.4securemail.com:25" is selected as Default.
- Click "OK."
- Exit Netscape and restart it for the changes to take effect. You should now be able to send/receive Email.
Manufacturer Technical Support
For technical support from Netscape, please visit https://help.netscape.com/netscape7/.
|
